WIRELESS ROBOT CAR
DO YOU KNOW HOW THEY MAKE ROBOT ?
NOW YOU CAN MAKE A ROBOT CAR YOURSELF TOO, KEEP READING TO KNOW HOW….
Robots or any kind of automated machine which is capable of doing wonders or doing things that only some superhuman could do have always amazed people. Robot cars have been in trend since the time they were introduced in the market. It has the tendency to attract the attention of anyone, be it a child or a fully grownup adult.
Anyone who came across these, must have wondered about its working and making at least for once in his/her life. In addition, specifically when we talk about Wireless robot cars, interest and confusion doubles up.
Therefore, to help such intrigued souls, we bring you this article about how you can learn and make a wireless robot car on your own. This project is especially useful for school and college going students and technical workshop organizers.
You can simply make a wireless robot car just by following the simple steps that are given below in this article or you can refer to this video tutorial. But before that let us understand a little bit about this project.
What is it and how does it work?
Wireless robots or robot cars are basically a mechatronic device that can be used for so many purposes based on our needs. For example, we can add a load carrying system on it and design the robot car accordingly so that it is able to carry the load and fulfill the purpose. Similarly, one can modify the robot car as per one’s need and it comes very handy to perform work easily.
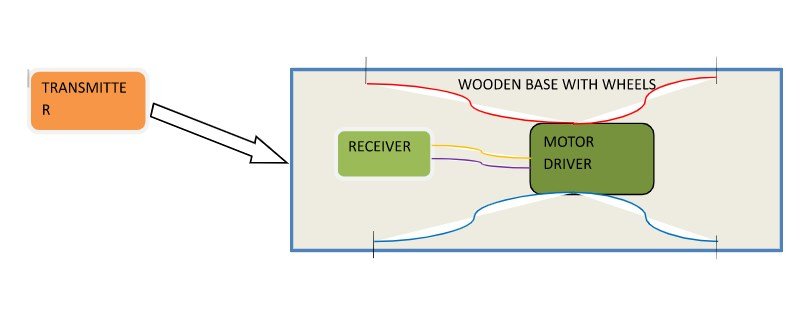
It works with the help of radio frequency or radio waves that carry the signal from transmitter to receiver.
We will be using modules of transmitter and receiver (you can buy these along with all other required components. Buy a wireless robot kit from here.) The output point of the receiver is connected with the input points of the motor driver, so that the receiver receives whatever signal can be given out to the motor driver. Based on the instructions received, the motor driver will drive the motors. These motors are attached to the wheelbase and are connected to the wheels of a robot car.
Thus, as soon as you press buttons on the transmitter, it will start guiding the robot car based on that without requiring any wire connection.
For easy understanding, you can refer this flow chart

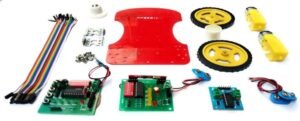
Step 1: Collecting the Components required for this project.

- RF MODULE KIT
- L293D MOTOR DRIVER
- 9V BATTERIES
- JUMPER WIRE
- 9 VOLT DC JACK PIN FOR BATTERY
- BATTERY CAP
- BO MOTOR x 4
- BO WHEELS x 4
- WOODEN BASE
You can buy all these in a kit from here if you want to make your own along with the instructions. In addition, if you want to buy this completed handmade project you must checkout this product on our website click here to check this product details. The product is available along with a full project report, synopsis, ppt that is a ready to use package. Free delivery available.
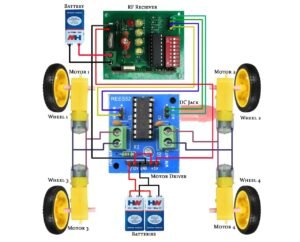
Step 2: Assembling the Components – Circuit Design

Connect all the components with the required wires as shown in the above diagram or refer to this video by SR Robotics to make proper connections guiding tutorial video .
FINAL PROJECT
If you want to buy this handmade project, with complete project synopsis for yourself click here
 And that is it. Thanks for learning with SR Robotics if you have any doubts or query you can contact us with the help of links given below.
For more Robotics projects, join our SR Robotics community
To buy more kits, visit our website
![]()
Check more on our website
![]() Subscribe SR Robotics channel on YouTube and keep learning
Subscribe SR Robotics channel on YouTube and keep learning
![]() Get all latest update on our telegram
Get all latest update on our telegram


